Storing data persistently with Amazon
| Author: | Rosangela Canino-Koning |
|---|---|
| Date: | June 7, 2010 |
If you want to save your data across instances – that is, if you want to have persistent data – Amazon can do that for you, too. You need to use the Amazon Elastic Block Storage service, which creates a virtual hard drive that you can (virtually) attach to your EC2 instance.
Note that EBS charges you based partly on how much disk space you have allocated per month, rather than on connectivity or anything else, so even if you don’t have an EC2 machine running, you’ll be paying Amazon for data storage.
You can read more about EBS here.
Prerequisites
This tutorial assumes you’ve already set up an account on Amazon Web Services, and that you’ve completed the EC2 tutorial to set up an Amazon instance.
Ask Amazon to create a new Elastic Block Storage Volume for you
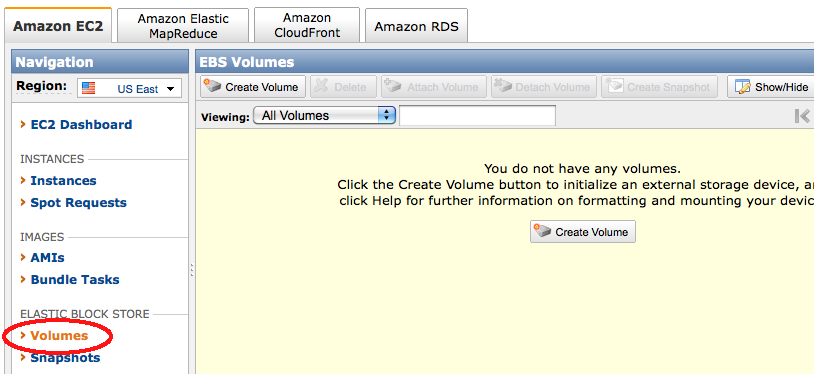
At the AWS Management Console, on the left menu bar, click “Volumes”.
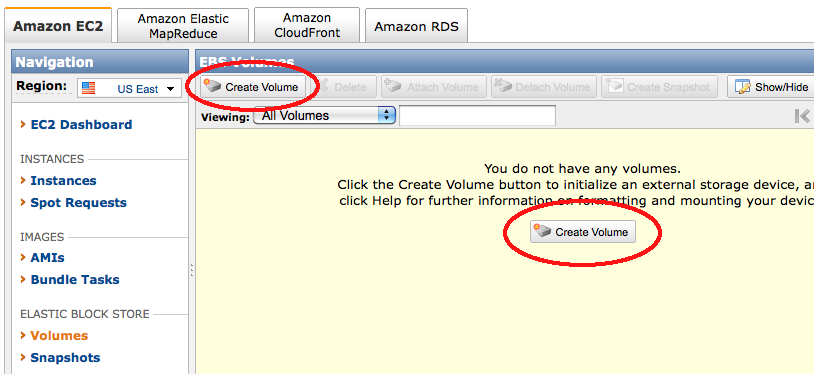
Click “Create Volume”.
Enter the desired size, and select the zone in which your instance is running. The volume and instance must be in the same zone. Otherwise, the volume cannot be attached to your instance.
Then click “Create”.

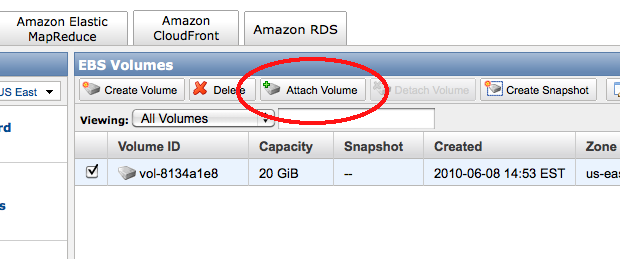
Wait for your volume to finish being created, then click “Attach Volume”.
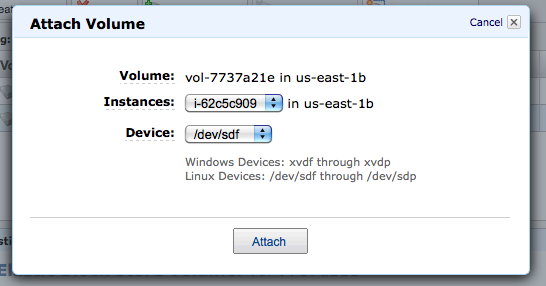
Select the desired running instance. It will ask you for a device name to attach; this should be ‘/dev/sdf’, ‘/dev/sdg’, etc. You can name it anything up to at least ‘i’ or ‘j’. Remember this for later – it’s how the computer will know which disk to store data on!
Click “Attach”.
When attachment is complete, connect to your instances via SSH.
If the volume is newly created, you must format the volume. WARNING: ONLY DO THIS ONCE, WHEN YOU FIRST CREATE THE VOLUME. OTHERWISE, YOU WILL LOSE ALL YOUR DATA.
mkfs -t ext2 /dev/xvdf
(If you used ‘sdg’ above, make it ‘xvdg’ etc. I know it’s confusing.)
It will ask you if you want to use the entire device – say “y” for “yes.
Then, mount the volume. You’ll do this every time you attach the volume to an instance:
mkdir /data
mount /dev/xvdf /data
Your drive is now ready to use – it will be available under /data. Files copied into that directory or directories underneath it will be stored on your EBS volume.
Shutting down your instance
Any volumes you have attached will automatically detach when you shut down the instance. You can also stop all processes that are using the volume, change out of the directory, and type
cd
umount /data
and then detach the volume via the AWS Web site.
Snapshotting your volume
Snapshots are backups of your volume that you can share with other people. Snapshots are much more reliable long-term than volumes are, and you can use them as a basis for creating a new volume (in which case the new volume will start out containing all the data in the snapshot). So, if you upload some raw data and want to work with it over a few weeks, we suggest:
- create a volume and load the data onto the volume
- snapshot the original volume
- make a new volume from the snapshot, and delete the original volume
You’ll only be charged money for storing the snapshot and any differences from the snapshot on the volumes based on that snapshot.
LICENSE: This documentation and all textual/graphic site content is licensed under the Creative Commons - 0 License (CC0) -- fork @ github.
comments powered by Disqus